Showing posts with label Sweet Treats. Show all posts

29 July 2009

Too many backlogs is a nightmare!

Due to my fantastic PC monitor, I now have so many backlogs to update before the next intermittent "crash". I had initially wanted to create separate posts for the different items, but after going through my earlier 2 posts, I decided to place all the remaining into this single post. So this will probably end up to be a super long post, please bear with me.

Ever since the Hokkaido fair, I had been wanting to try my hands on some of the Japanese sweet treats. Last Friday, I finally could find some time to make these.

Hanami Dango


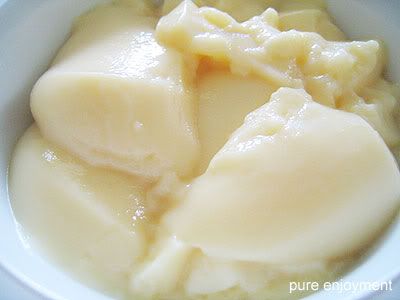
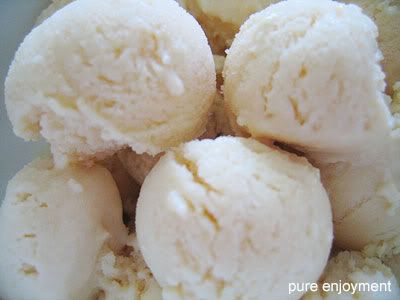
Hanami (means flower viewing) dango is traditionally made during Sakura-viewing season (source: Wikipedia). Dango is similar to our 汤圆 in texture. This experiment wasn't too fascinating as I've made them too bland. I must remember to increase the amount of sugar the next round.

On that same day, I made Radish/Carrot cake too, so that we can have them for breakfast on Saturday. I ended up with one big chunk of carrot cake and our family could only finish half of it, including a portion which was given to our neighbor. That was how much I had made!
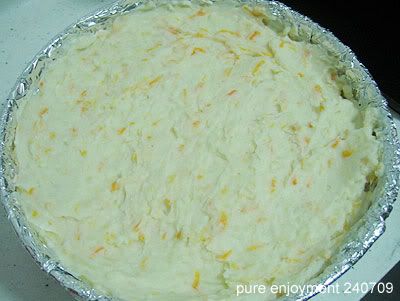
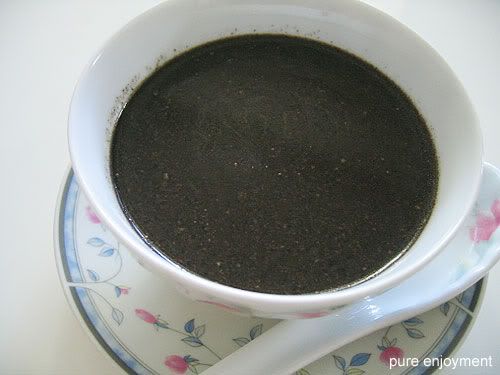
Black Carrot Cake


White Carrot Cake


I like the texture of this carrot cake as it yields a very soft cake. Reminds me of a previous Chai Tow Kuay store I used to frequent. The store has since moved away when the area was called for redevelopment.

I have halved the recipe here. It should serve 4-5 person.

Radish/Carrot Cake

Ingredients

100g radish, shredded
60g carrot, shredded
1 tsp sugar
1.5 tsp salt
250g rice flour mix well with 850ml water

Method

1. Fry radish and carrot for a few minutes. Simmer with a little water (approximately 100ml) till soft and water is about to dry up.
2. Turn down the heat. Pour the flour mixture through a sieve into the wok slowly.
3. Add in sugar and salt.
4. Change to medium heat and cook till mixture starts to dry up like the texture of mashed potatoes. Turn off heat.

5. Line baking tin with aluminum foil. Scoop the mixture into the tin and smoothen.
Note: I use a 9" round cake pan for double the recipe.
6. Steam over high heat for 45 mins. Cool completely before use. (I cool it overnight in the fridge.)
Note: the steamed carrot cake may taste a little bland on its own. It should be just nice after frying.


Frying

Ingredients

1.5 tbsp chopped seasoned turnip (Chai Por)
2 eggs, lightly beaten
Salt
Light Soy Sauce
Sweet Sauce

Method
1. Rinse and soak the turnip for about 5 minutes. Drain and squeeze out excess water.
2. Fry the turnip for 1-2 mins. Add carrot cake (cut into strips of 1cm x 3cm) and fry together. Break them up into smaller chunks with your wok spatula.
3. For white carrot cake, add salt and/or light soy sauce to season. For black carrot cake, add soy sauce and sweet sauce to season.
4. Spread out the carrot cake to a single layer. Pour the beaten eggs over it. Let the eggs set a little before turning over.


I have one more item to blog on. But I'm really too tired and hungry now. Will continue tomorrow if the monitor is still with me. Going to tuck in some cold cold ice cream next!

25 June 2009

Soy Goodness

I remembered the first time I tried 丁香豆花 was years ago when I was still working near Maxwell Market. It left a deep impression on me as it was really different from our conventional Tau Huay. It was very very light, smooth and really refreshing. Another major difference was the color. 丁香豆花 was yellow in color and looks much like a custard rather than Tau Huay.

Ever since I turned into a SAHM, I couldn't have my favourite dessert as and when I would like to. It was not commonly found in Singapore. The other place I've seen it was in Chomp Chomp food centre (not even sure if it is still there).

I've been asking around to see if anyone has the recipe for my much missed dessert. Not much hope. Most have not even heard of it. I almost already gave up hope until I stumbled upon a 北極熊小小到處逛, a Chinese blog that features the recipe of a Taiwan dessert with the same name. To be honest, I wasn't 100% sure it was the same thing. It looks similar. I just had to try it to confirm.


丁香豆花

Ingredients
Soy beans
water
sugar
7g gelatin
2 egg yolks

Method

1. Soak the soy beans overnight or at least 5 hours. Remove the skin after that and rinse well.
2. Boil the skinless beans in water over low medium heat for half an hour.
3. Using a ratio of one part of beans to 4 parts of water, blend the cooked beans with sugar (according to individual taste) to achieve soy milk. I made my soy milk sweeter as I do not intend to add syrup to my Tau Huay.
4. Sieve the soy milk using a cotton bag.
5. Warm 600ml of soy milk over low heat. Dissolve 7g of gelatin into it. Remove from heat when done.
6. When it is cooled (not hot to touch), add the egg yolks in and mix well using a hand whisk.
7. Chill in the fridge for at least 3 hours. Serve cold.


I would say my version was close, but not exactly the same. The texture differs slightly from the 丁香豆花 I remembered. Mine was soft and smooth too, but I just have the feeling that it's not there yet. I'm not too sure if it's the gelatin being used in the recipe or my homemade soy milk that is causing the difference. Regardless of my own persistence, the dessert is well received by the kids. I had positive comments from the few of my friends who have tested it too.

Since I had quite a bit of soy milk left (even after consumption), I used part of it to make the Eggless Soy Milk Ice Cream by Rei.


I added the fine soy residue in my cotton bag into the ice cream. It resulted in a strong soy flavour that you won't miss. I also blended in a bag of butterscotch morsels to add on its flavour. The only "complain" I had with my experiment was, the texture was more like a sorbet rather than a creamy ice cream. After contemplating for a few days, I finally added more whipping cream into the sorbet today and gave it another round of whipping in my Vitamix. The poor machine was working so hard to break up the frozen sorbet into milk shake state. As to how it will go, I will only know tomorrow.


After note:
I tasted a little of the "new" ice cream straight from the freezer. It's much better with the additional whipping cream (erm...of course much fatter too!). Not as hard and icy as the first batch and definitely more like ice cream!

14 April 2009

It's just not right

Have you ever tried cooking something that is really foolproof but you just didn't get it right? Well, it happened to me today.

I had a pack of Black Sesame powder in my fridge for quite a while. Initially had wanted to use that for my bakes, but I reckon it'll probably take a few more months before I can finish it off. Was browsing through KC when I saw a recipe on Black Sesame Paste (芝麻糊). I thought that would be a great way to use up the remaining powder. So I went ahead to adapt the recipe using my powder.


Not too sure if I had burnt it in the process of cooking, there seem to be a slight bitter after taste. Or should it be like this? I seldom consume Black Sesame Paste, so can't really remember what the authentic taste should be. But overall, it's still edible and I'm glad I've finally finished that pack of black sesame. LOL....

03 June 2008

Mango Pudding

I've been slacking in my baking as I'm now too "poisoned" by plants. Just bought a pot of African Violets on Sun. Hopefully it doesn't die under my not-so-green fingers.


Bought 6 honey mangoes at $10 a few days ago. They were not in tip-top condition, so I had to think of what to do with them. Used 2 to make some mango pudding using Rei's recipe.


I was being too experimental. Instead of using white sugar, I used those orangy-looking sugar. So the pudding looks a little orangy and not as appetising as Rei's. Taste wise, I find the gelatin smell to be rather prominent (probably because I've added a little more gelatin than the required amount). But the 2 girls still finished them without complain. Darren has been quarantined from the puddings due to his fever and cough (yes, again).

I've got a few items on my to-bake-list that I had wanted to do this holiday, but all put on hold as I know the boy would complain again if I say "Darren, you cannot eat this...".


Mood: bored

09 May 2008

Preserved Roselle

This post is a little late, it was supposed to be "published" yesterday, but I was busy revising composition with ds. Now that all three kids are in school, I have a little time to catch up with my blog.

My preserved Roselle is finally ready.


I took some to Karina's teachers and they both like them. They even ask for the recipe.

The ones I did (left in the pic) are more crunchy as compared to those sold in titbits store (right in the pic). The color is also much darker. They really make a good snack for munching.


I hope I can grow the Roselle successfully so that I can preserve more in future. One of my seeds seem to have germinated. I wasn't too sure as the root look so tiny and dainty. I've planted that seed into a small pot. Hope to see it sprouting soon. Please don't die on me ok?


Mood: pleased

24 April 2008

Red Little Jewels

It is amazing how mother nature works. It can create so many beautiful things just on its own. Remember the little seed I bought? It has since grown into a "big little plant" and is quickly finding its home around my window grills!


Today Pauline gave me some "red little jewels", another amazing product of mother nature.


They are actually Hibiscus Sabdariffa Linn or Roselle (洛神花). Roselle is rich in protein, organic acids, amino acids and Vitamin C. It's natural bright red color makes it a good choice to be made into jam, juice, wine, etc.


This little jewel tastes sour in nature. But when preserved, it makes a wonderful snack! Pauline let me tried some of the preserved Roselle she had bought and I'm immediately sold. So "sold" that I had to search for the recipe once I got back. And I was lucky enough to find it here.

Preserved Roselle (洛神花萼蜜餞)

Ingredients
Slightly more than 1000g fresh Roselle
60g salt
*800g sugar (divided into 300g, 150g, 150g and 200g)

Method
1. Remove the receptacle from the Roselle. Wash and air the Roselle flowers dry. You should have about 1000g of flowers left.
2. Season the flowers with salt for 24 hrs to soften the flowers. Remember to give the flowers a few tosses in between the 24 hrs.
3. Squeeze out the salt water the next day. You can use the salt water to preserve raddish or young ginger.
4. Season the soft flowers with 300g of sugar. Leave in the fridge for 4 days. Remove from the fridge after 4 days and season with another 150g of sugar. Leave in the fridge for another 2 days. Then season with another 150g of sugar and leave in the fridge for another two days. Finally season with the last 200g of sugar. When the sugar has all melted (about two days later), the preserved Roselles are ready for consumption.

Note:
- Remember to toss the Roselles frequently during preservation to ensure the sugar is evenly spread out.
- Adding sugar in a few rounds help to retain the crunchiness of the preserved fruits.
- Keeping the fruits in the fridge helps to preserve the natural bright red color.
- I've added 200g more sugar (than the original recipe) on the 8th day as the Roselle still taste a little too sour.


I've got a packet of washed and cut Roselle from Pauline (how sweet of her!). It weighs about 110g. I have seasoned it with about 7g of salt at a start followed by 30g, 15g, 15g and 20g of sugar in 4 batches. See the end results here.


Mood:

10 April 2008

Back to Buns

After a few rounds of loaf, I'm back to buns again. You'll probably be seeing more of buns these few days as I've just borrowed a Bun Lovers from the library yesterday. Flipped through the book and have already bookmarked a few which I'm interested to try. The first being this.

Nugget Salad Bun


I was immediately captivated by the picture in the book when I first saw it this morning. I just had to set my hands on it. Afterall, I had all the ingredients, so no excuse, right? :)

It was a pretty easy recipe. The dough, however, was wet. I had reduced the liquid in the recipe and it was a little better. You see, I did 2 batches of the dough and combined them together. That was how I know. It took me about an hour to knead the dough before I was willing to say ok.

On a side note, I'm feeling more and more uncertain as I do more hand kneading. I never seem to be kneading the dough correctly though I've followed the various videos. Some say we are not supposed to tear the dough during kneading. But I find my dough always tearing during the kneading (when I fold back). In fact, while doing the membrane test, it'll also tear up most of the time. It's never that elastic like a rubber, like what I've seen in some books.


Luckily, the breads turned out real good and soft. Good snacks for kids as they were small little buns, not the usual big ones we had. Definitely a keeper.

Nugget Salad Bun

Ingredients
Bread flour 350g
Cake flour 50g
Instant Yeast 8g (original recipe uses 11g)
Salt 1/8 tsp
Sugar 30g
Milk Powder 50g
White Sesame Seeds 1/2 tbsp
Milk 290g (original recipe calls for 300ml of full cream milk, but I used 290g of HL milk)
Butter 50g

Fillings
28 pieces chicken nuggets, fried (I used breaded fish burger patty and cut each into 4 pieces after frying as the nuggets shown in the book is breaded)

Toppings
Mayonnaise 3tbsp
Lettuce 100g (shredded)

Method
1. Combine all dry ingredients and mix well. Add in milk to form a smooth dough. (If using mixer, mix at medium speed.)
2. Add in butter. Knead dough till smooth and elastic. Cover and rest dough for 30 mins.
3. Divide dough into 30g per portion. Roll into rounds and rest for 10 mins.
4. Flatten each dough, wrap in fried nugget. Seal all edges and roll into square shapes.


5. Cut the dough into halves and put them together into mould.
Tip: Try not to cut through, leave the bottom layer of dough intact and fold along the uncut dough. If you do cut through, you can place the halves on top of each other and give them a light press. To ensure your dough stands straight and does not fall apart, it is good to place them in small cups (2 inch diameter) for second proofing.


6. Leave to rise until double in size. Baked in preheated oven at 200°C for 15-20 mins until cooked.
7. When cool, drizzle with mayonnaise and garnish with lettuce shreds before serving.
Note: If you intend to store the bread for later consumption, do not fill the toppings beforehand.


I did not use all the dough just to make the buns. I used some of it to make some Chocolate Swirl Buns.


After wrapping the dough around the chocolate sheet, I did a 3 folds, roll out and another 3 folds and roll out. Then roll the dough swiss roll style starting from the long end. Finally cut it into small portions and place them into paper cups for second proofing. I thought they look a little like roses, don't you think so?


Finally, this is the red bean ice-cream that I've made using my VM. It's not too sweet, just nice for the kids. Next time, I'll add some red bean chunks to give it more texture.


This recipe was created for the VM. If you're interested to give it a try, make sure you use an equally strong blender.

Red Bean Ice-cream

Ingredients
Red beans 200g (cooked)
Sugar 100g
Water 300g
Cream Cheese 100g
Condensed Milk 35g (optional)
Plain Yogurt 20g

Method
1. Blend the cooked red beans, sugar and water together in high speed for 1 min. Freeze the mixture overnight into ice cubes.
2. Blend the red bean ice cubes together with other ingredients using variable speed 1 to 10, then high speed for 30 secs until creamy.
3. Freeze the mixture for a minimum of 2 hours.
Note: I find that 2 hours is barely enough to freeze it. Usually I will let it freeze overnight. Using a steeper container will need a longer time for the ice-cream to freeze.


Mood: happy

08 April 2008

Mochi, again?

Yes, again. This time, I did a chocolate mochi, based on my own estimation. Not sure what could have gone wrong, the mochi seemed a lot more sticky than my first round. I kneaded it a little, as suggested by Rei, so it was much more elastic this time.


I did 3 different fillings, marshmellow, my own homemade soy bean ice-cream and honeydew. The best ones were the ice-creams, also the most tedious. Through the different fillings, I've learnt something about mochi. Never put too big a filling, the mochi will sag and start to tear. The best way is to shape your fillings round. Mochi seems to work magically well with anything round...lol...

Mochi with soy bean ice-cream


Mochi with honeydew


If you're interested to try, here's the recipe.

Chocolate Mochi

Ingredients
1 & 1/4 cup glutinous rice flour or mochiko
1/2 cup chocolate, melted (I use a mix of chocolate chips and chocolate truffles)
1 cup water
1/4 cup sugar

Method
1. Stir all ingredients in a heat-proof bowl until smooth. Make sure there isn't any lumps.
2. Steam in high heat for 30-45 minutes until the mochi is cooked.
3. While it is still hot, knead the mochi with a mixer at medium speed until it is elastic. Leave to cool before wrapping your desired filling. You can refer to the original recipe for tips on wrapping.
4. Dust each mochi ball with some cocoa powder and chill before serving.


After note:
I realised the mochi is a little chewy and not as soft as my first batch after I've chilled them. I suspect it's due to the chocolate and cocoa powder dusting, coz I read from the net that these taste like chewing gum (although mine wasn't really that bad)! So maybe it's best to just eat them fresh.


Mood: tired

29 March 2008

For that sweet tooth of mine

Bought a covered bread tin recently. Now I can have taller loaves (hopefully). Tested out the bread tin with my usual Cream Cheese Bread. Made the loaf for Kat and her family. It didn't turn out as "square" as I wanted it, but still ok.


Today I tried a new bread. Saw the recipe from a chinese site a few weeks ago. I told myself then to add this to my to-do-list. I had the main ingredient, mango, today, so I see no excuse to give it a skip.


This recipe uses a water-roux starter (湯種)too, but not the 65°C water-roux starter. I've changed the recipe slightly to increase the amount of mango used.

Tang Zhong Mango Loaf

Water-roux Starter

Ingredients
90g Bread Flour
65g boiling water

Method
1. Place the bread flour into a bowl. Pour in the boiling water and stir with a spoon. Use hand to knead into a dough when cooled enough to handle. The dough will be like a normal bread dough.
2. Covered and keep refrigerated overnight for 24 hrs. (I only kept for about 15 hrs.)

Main Dough

Ingredients
150g fresh mango (I use Honey mango)
80g water
50g sugar
3/4 tsp salt (3g)
20g milk powder
30g unsalted butter
260g bread flour
1 & 1/8 tsp yeast (4g)
water-roux starter

Method (manual)
1. Blend mango and water to puree in a blender.
2. Place 175g of the mango puree into a large mixing bowl. Add in all ingredients (except the water-roux starter) to mix to a dough.
3. Divide the water-roux starter to small pieces and add them to the dough.
4. Knead the dough till smooth and elastic (about half an hr). You can perform the membrane test to see if the dough is ready.

5. Round it up into a smooth ball and place it into a well greased bowl to proof till double in size. Cover the bowl with a damp towel.
6. When proofing is completed, punch down the dough to release the air and let it rest for 10 minutes.
7. Divide the dough into 3 portions. Roll each portion into swiss roll style and place them into a bread tin for second proofing till double in size.

8. Baked in preheated oven at 180°C (covered tin) or 170°C (uncovered tin) for 30-35 mins.


This is a sweet loaf. The bread is soft. The mango aroma is not that strong, in my opinion. I think it'll depend on the kind of mango you use in the recipe. But overall still a tasty bread.


Besides bread, I also tried making my own azuki bean paste. I love japanese bean paste which has a slightly coarse texture. I think the paste would be great for buns, mochi, bao and so many more...I'm a bean lover...lol...

Homemade Azuki Bean Paste

This recipe yields one big tub of paste. You can reduce it to a smaller amount to suit your need.

Ingredients

500g azuki beans (red beans)
150g sugar
1/2 tsp salt
water

Method
1. Wash and soak the azuki beans for a few hours or overnight.
2. Boil the beans in a pot with just enough water to cover them for 5 mins. Drain and fill the pot with tap water. Boil for another 5 mins and drain again. This double boiling is supposed to give the beans a better texture.
3. Fill the pot with water till about an inch (2cm) above the beans. Add the sugar and salt and bring it to a boil.
4. When boiled, lower the heat and simmer till beans are cooked and falling apart. You may need to add water if the beans get too dry.
5. When done, drain off excess water as much as you can. Mash the beans with a fork and leave to cool completely before storing.
Note: I boiled my beans till only a little water is left. Then I scoop the beans out with a ladle with holes and drain each scoop for about 2 mins before transferring them to another bowl for mashing.


After note (added on 1 Apr 08):
I used this in my Shanghai Red Bean Pancake. Realised the bean paste is only mildly sweet when you use it in other recipe. Eating it alone, especially when just done, will give you a misconception that it is very sweet. Do take this point into consideration when you do your own taste testing. Additional bean paste can be stored in freezer.


Mood: satisfied

26 March 2008

Mochi Mochi meets Baked Macaroni

I am bored, yes, again. I guess I am one who's easily bored, who cannot stand doing nothing for even a day. I do not have to bake bread today as I still have enough for tomorrow's breakfast.

So I decided to try my hands on mochi, perhaps it's because of the exquisite mochi I've bought recently. Did a search for the recipe of mochi from the net. I realised it's the basic combination of glutinous rice flour (be it local or mochiko), water and sugar. I only have the local glutinous rice flour on hand. I reckon I can always try with mochiko later if I can at least succeed using the local flour. So I went ahead with the experiment. *grin*


Mochi

Yields 15 mochi

Ingredients
1 cup glutinous rice flour or mochiko
*1 cup water (suggest to use 80% of a cup)
1/4 cup sugar

fillings of your choice (I use red bean paste)
cornflour for dusting

Method
1. Stir all ingredients in a heat-proof bowl until smooth. Make sure there isn't any lumps (I used a sieve to sieve through the mixture).
2. Steam in high heat for 30-45 minutes until the mochi is cooked (it should be translucent). Leave to cool.
3. Meanwhile, prepare the fillings. Roll each teaspoon of fillings into a small ball. Leave aside for later use.
4. Pour some cornflour into a deep plate or large bowl for dusting. Make sure your hands, working top and tools are well dusted before you start the wrapping as the dough is very very sticky!
5. Dust a tablespoon with cornflour. Scoop a tablespoon of mochi dough and drop it into the cornflour. Make sure the dough is covered with cornflour so that you can handle with your hands.
6. Gently shake off any excess cornflour and roll out the dough. Do not roll it out too thin as the dough is very soft and will be difficult to wrap.
7. Wrap the fillings in the centre and seal up the opening. Try to shape the mochi into a ball by rolling between your palms (rather difficult, in my honest opinion). Shake off any excess flour (Tip: I throw the mochi lightly into the air and bounce it a few times with my hand).

Note:
* I find 1 cup of water a little too much as the mochi is too soft (though very nice). So the next time I'll reduce the amount of water to see if it's better. I added a few drops of rose pink colour to the water to yield pink mochi.


Ds requested for baked macaroni for dinner. Since I'm too bored to cook rice, I agree and did a simple version. The kids love it so much that they each had an extra serving.


Baked Macaroni

Serve 2 adults and 3 kids

Ingredients

200g macaroni
1 large piece of fish fillet, cut into big chunks
6 Crabsticks
Vegetables of your choice (e.g. brocoli, cauliflower, mix vegetables)
1 egg, beaten
butter

Paste ingredients:
6 tblsp plain flour
2 cups milk
2 cups water
2 tsp salt


Method
1. Season fish fillet with a little salt and pepper for at least half an hour.
2. Boil the macaroni in a large pot of water (with a little salt and oil) till cooked. Set aside.
3. Heat a little butter in a wok and briefly fry the vegetables (need not be fully cooked). Set aside.
4. Mix all paste ingredients together till smooth. Heat a little butter in the wok again. Pour the mixture in and cook to a paste (not too thick).
5. Add the drained macaroni and other ingredients into the paste and mix well.
6. Remove from heat and transfer to a large casserole or baking pan. Sprinkle grated cheese generously on top and baked in preheated oven at 200-220°C for 20 minutes or until the top browned.


Mood: full