There has been much rave about this 65°C water-roux starter ever since Florence started getting all of us hooked...lol... The water-roux starter is known to yield soft and fluffy bread due to its higher water absorption. The bread has long-lasting freshness too. Florence has given a very good explanation of the 65°C water-roux starter here.
The water-roux starter is basically a mixture of flour and water in the ratio of 1:5. The mixture is then cooked at 65°C. The only disadvantage of this starter is, you'll have to finish using it within 3 days. Otherwise you may need to discard it once the colour has turned greyish. I've made the 65°C water-roux starter today with her comprehensive explanation and illustration.
65°C water-roux starter
Ingredients
50g bread flour
250ml water
Method
1. Mix the bread flour and water in a saucepan until you have a smooth paste.
2. Cook the mixture over medium heat stirring constantly. When the mixture starts to thicken a little (about 2-3 mins), reduce the heat to prevent burning the mixture.
3. Continue stirring until streaks appear as you stir.

4. Remove the mixture from heat and cover it with a cling wrap. The cling wrap has to touch the surface of the mixture to prevent it from drying.
I decided to test this starter on the chocolate wassants. I've tried making chocolate wassants earlier on and have failed terribly. I had used off the shelf chocolate paste then and the wassants ended up in a mess. The texture was hard too.
This time round, I made the chocolate paste diligiently. I followed the recipe posted in Florence's blog, but made some slight modifications. I hand knead the bread dough. The dough was not difficult to handle.
Chocolate Wassants
Chocolate Paste
Ingredients
50g cake flour
120g sugar
2 egg whites
160ml milk
50g cocoa powder
20g unsalted butter
Method:
1. Mix cake flour, sugar and egg white till you have a smooth paste (I just use a spoon to do this).
2. Heat the milk in a saucepan over low heat and stir in the cocoa powder. Mix well.
3. Add in the egg white mixture. Keep stirring until the mixture is real thick and dry (this takes a while).
4. Add the unsalted butter and stir until all butter is incorporated.
5. Remove from heat and leave it to cool completely.
6. Measure 300g of the chocolate paste. Put this chocolate paste into a plastic bag and roll it into a rectangular shape of size 22cm x 14cm.
6. Keep the paste refrigerated overnight.
Bread Dough
Ingredients
250g bread flour
70g cake flour
20g milk powder
5g salt
40g sugar
8g dry yeast
100g water roux starter
25g egg yolk (2 egg yolks) + 115g warm water
25g butter
Method
1. Place all dry ingredients in a large mixing bowl and mix well.
2. Add in the rest of the ingredients (except butter) to form a dough.
3. Knead the butter into the dough.
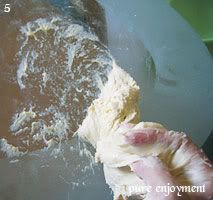
4. Move the dough onto a table top (I use glass top) and knead it till smooth and elastic (I took 30 mins). (Refer to illustrations below)
5. Round it up into a smooth ball and place it into a well greased bowl to proof till double in size.
6. When proofing is completed, punch out the air.
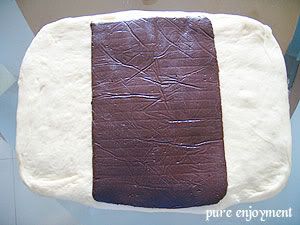
7. Roll out the dough into a 31cm x 23cm rectangle.
8. Place the chocolate paste in the middle of the rectangular dough (top and bottom should have a little allowance for sealing).
9. Fold both ends of the dough towards the centre to cover the chocolate paste completely. Seal all edges tightly.
10. Turn the dough 90°. Roll it out to about 60cm x 22 cm.
11. Fold both ends of the dough towards the centre (similar to step 9), leaving a little gap in between.
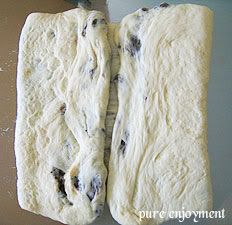
12. Fold the dough along the gap so that the two ends from step 11 (now at the centre of the dough) are hidden inside.
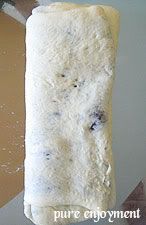
13. Roll the dough into a 54cm x 22cm rectangle.
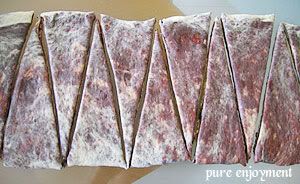
14. Cut the dough into triangular pieces with base 9cm and height 22cm.
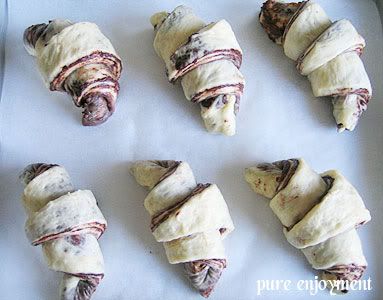
15. Cut a little slit in the middle of the 9cm base. Make a little fold upwards on each side of the slit and roll up the triangular piece swiss roll style towards the pointed end.
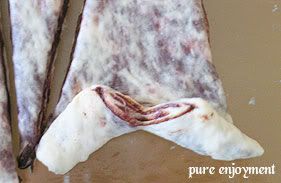
16. Ensure the pointed end stays at the bottom of the wassant and leave it on a lined baking tray for second proofing till double in size.
17. Bake in preheated oven at 175-180°C for 18-20 minutes until the wassants are lightly browned.
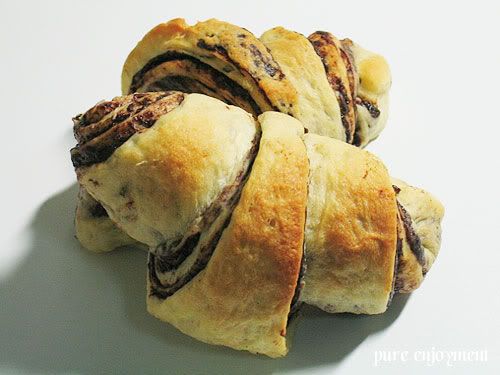
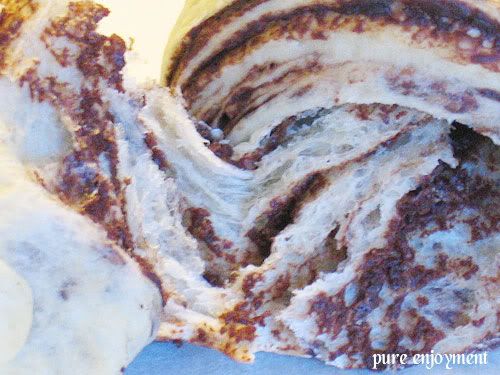
I think I need quite a lot of improvement in my wrapping and rolling skills. The face of my dough is not smooth (maybe because I never floured my top?) and some part of the dough seems to be too thin until the chocolate paste can be very clearly seen. As a result, the wassants were not nicely shaped. The chocolate "lines" were not clearly defined.
Nonetheless, the texture is very good! Super soft, totally unlike my previous batch. I'm going to use my remaining starter to try on my tested recipes.
In the process of making these wassants today, I have taken some pictures to illustrate how I hand knead my dough. It may not be the best/correct way, but this is how I do it.
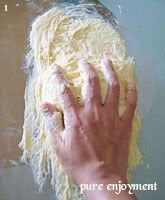
Hand kneading
1. Using the palm of your hand, press and push the dough away from you. In the beginning, the dough will be sticky.
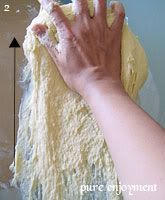
2. Pull back the dough towards you and repeat the same pressing and pushing.
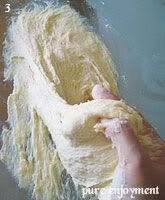
3. It helps a lot to have a plastic scrapper or spatula to scrape up the dough from the table top after a few kneads.
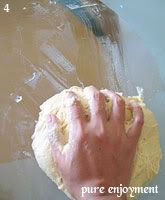
4. As you knead, the dough will get less sticky. When you reach a stage where majority of the dough seems to be able to pull away from the table and does not stick to your hand that much, you can do the famous stretch test by slowly pulling a part of the dough away. The dough should be able to stretch thinly before it starts to tear.
Doesn't look too difficult, right? :)
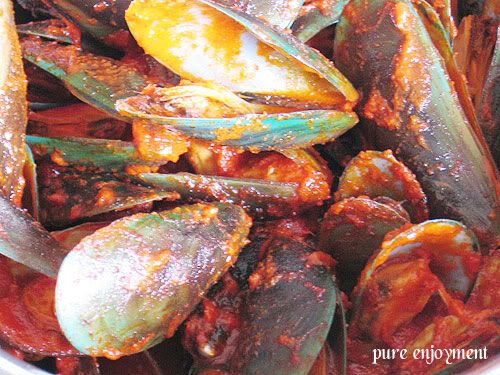
Last but not least, I'll end off this super long post with a picture of what I've cooked for lunch today, Sambal Green Mussels, a dish I've learnt in the recent Tekka Tour. I've finally managed to get some green mussels from Cold Storage today (after searching for so many days) to try out this dish. It was spicily yummy!
Mood:
 satisfied

16 comments:
Looks delicious.. i bet it taste delicious too.. maybe should try it with nutella :)
wow wf, you did it! choc wassant, don't have to pay 50cents each. that is the ultimate for me. i bake a cruchny peanut butter bread last night. must be the yeast (using bake king instant yeast), it has a weird taste, slightly bitter. what yeast do u use?
cocoa, can't do with nutella coz it's too soft/oily. I've tried it the last time with nutella-like spread, fails terribly. :( The chocolate paste here is much drier. Saw your cranberry cream cheese bread, very nice!
yuri, I've answered your query in your blog. Don't think your problem is the yeast (I use the same yeast too), I suspect it's the peanut butter. Don't give up, keep trying. You'll get it right eventually. I remember when I first started out, I failed at least 4 times before my first successful loaf.
Thanks WF for this entry, helps me alot. God bless your heart for being so giving and sharing.
Vennila
Thanks wf for the advise. I will try to make cream cheese bread later. Do u think the yeast will go bad if I didn't put it into the fridge last night after opening?
wow~ nice post! ^^ your bakes looks delicious~ and thanks for the step by step instructions!
Amanda
Vennila, thanks for dropping by. I always believe in giving and sharing coz I will learn more this way. :)
Yuri, the reason for keeping the yeast in the fridge is because yeast reacts in warm condition. That's why proofing of bread is always best in warm place. If you didn't store it in a warm place, chances are it's still ok. Open up the bottle, if the yeast looks and smells the same, then probably can still use it.
amandalwh, hope the pics help you. Err...not all my bakes end up successful :P
When I saw Aunty Yochana's Wassant....I thot i should give it a try. Now tht I'd seen yours...am sure tht I'm gonna try this out :) Thank you for E detailed desc. Urs was easy to understand. Wish me success! :p
maya yunos, glad my pics were useful to you. good luck and happy baking!
Hi kwf, your chocolate wassant looks great!!! Can I have one please?!!
HHB, can! But they're still quite ugly...hahaha...the surface looks like an old lady!
Hi, after reading your post, I plucked up the courage to try making the choc wassant. Just a couple of questions:
1 - will it work if i use my KitchenAid, (instead of using hand) to knead the dough till it forms into a ball?
2 - when you knead by hand, i noticed from your pictures that you did not add any extra flour. Does the dough form into a ball just by kneading without adding any flour?
i tried the recipe but i dont know what went wrong T.T i omitted milk powder and hand knead the dough as per your instructions but the dough was still sticky, couldnt roll it into a flat rectangular dough as it keeps tearing. is it suppose to be like this? and the chilled choco paste clinged on the plastic and couldnt come out as a whole, it was sticking everywhere. could you advise what can be done to both the dough and the choco paste so that they wont stick too much? >.<
thank youT.T
best regards,
cherry
cherry, if I recall correctly, the dough is really quite wet. What you can do the next round is, pour in the liquid bit by bit as you knead so that you can better control the wetness of the dough. My choco was ok. Could it be the kind of plastic you use? I use the normal transparent plastic bag or what some call as sandwich bag.
mother and daughter bake, sorry for the very late reply. Yes, you can definitely knead in KA, it'll probably be easier to handle than by hand. I usually do not like to add flour to my dough as it tends to make the bread dry if too much flour is added. It is more difficult to knead without adding flour and you'll need to constantly scrap the dough from the table top, which is why I always choose to work on a glass top. The dough may not form into a ball after kneading. We've got to roll it into one as it is usually very soft.
I tried chocolate wassants today. Had some problems:
1. The dough was wet and sticky.
- Probably added 30g more bread flour to it. Still very sticky compared to Italian bread or brioche recipe.
- To overcome the problem, I cut a transparent plastic bag with some flour on it for the bottom and use another on top to roll the dough. Sticky but not so bad to handle
2. The chocolate paste was a little bitter.
Perhaps, I've only used 50g sugar for the chocolate dough. Your 120g should make it tastes better.
3. The dimensions (I used Florence's) were too big for my liking!
4. Forgot to grease one batch and had a hard time removing the buns from the tin :(
The only saving grace is the bread is very soft! But, the buns' outer layer is a bit crispy... :(
Post a Comment